Wednesday, March 28, 2012

(almost) Wordless Wednesday: Pottery Class!

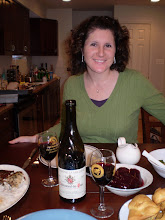
Last weekend, Steve and I took a pottery class! It's a pretty funny story, which I will tell later, but here's me and my second project, yes second, a small bowl!


More pictures and the story to follow!


Have you ever done a pottery class???

Tuesday, March 27, 2012

Tasty Tuesday! Mexican stuffed shells.


I saw this recipe on pinterest a few weeks ago and knew that Steve would love it. Mexican stuffed shells! Anything with cheese, and he's a happy man.

I would have made it sooner, but discovered that jumbo pasta shells are not too common at grocery stores in DC! I looked at half a dozen, I think, and never saw them, until this past weekend. Oddly enough, I was at a store that I rarely go to, because I find it so disorganized, yet they had the jumbo shells I needed! So, win!

Here is the original recipe, found at a blog called The Way to His Heart. Cute name, eh?


Mexican Stuffed Shells

Ingredients:

1 lb. ground beef
1 package low-sodium taco seasoning (or better yet use this Taco Seasoning!)
4 oz. cream cheese
14-16 jumbo pasta shells
1.5 cup salsa
1 cup taco sauce (This is a smooth, tomato based sauce found in the Mexican section)
1 cup cheddar cheese
1 cup monterey jack cheese
3 green onions
Sour cream

Preheat oven to 350°.

In a frying pan cook ground beef; add taco seasoning and prepare according to package directions. Add cream cheese, cover and simmer until cheese is melted. Blend well. Set aside and cool completely. While ground beef is cooking, cook the pasta shells according to directions; drain. Set shells out individually on cutting board/baking sheet so that they don’t stick together.

Pour salsa on bottom of 9×13 baking dish. Stuff each shell with the meat mixture. Place shells in 9×13 pan open side up. Cover shells with taco sauce. Cover with foil and bake for 30 minutes.

After 30 minutes, add shredded cheese and bake for 10-15 more minutes, with the foil removed. Top with any condiments you’d like (green onions, black olives, etc.) Serve with sour cream and/or more salsa.

My edits:

First, I used ground turkey instead of beef.

I used the entire block of cream cheese, so 8 oz, instead of half of it. It made it super creamy!

I forgot to buy the green onions.

The shells get slippery and are hard to fill. I used a ladle to help keep their shape while filling them!

You can see from my photo that I baked them in a round dish, I think it's nine inches. It's Boleslawiec, a Polish pottery that I collect. It has handles!

I also didn't pour the taco sauce over them before baking- I just used salsa in the dish, and placed the stuffed shells over the salsa. I baked them for about 20 min, then took the foil off, and sprinkled the cheese over them, baking for another five or eight minutes.

They were delicious, Steve was a big fan!


Hmmm, it doesn't look as pretty in the pictures, but I feel like most pasta/cheesey dishes don't photograph well! I guess I should work on my food photography skills, eh?

I posted this at Scarlet Threads blog today too.

What are you cooking this week? Do you have a recipe that you want to share with Scarlet Threads readers?
We love finding new recipes to post!

Also, speaking of Scarlet Threads, have you seen their new line of jewelry? It's a new partnership with a Ugandan organization that works with women and children, and we're so thrilled to be working with them. Keep an eye out, I think there may be a giveaway coming up ;)


Monday, March 19, 2012

pimp your lemonade!


I saw this on pinterest and I love it!

Maybe I should print it out and put it in a cute white frame in the kitchen? Might be fun!

I do love me some lemonade, all year long!

I love raspberries in it, or strawberry slices too.


pinned here and here is the source


Do you drink lemonade? Do you add anything to it?


Wednesday, March 14, 2012

(almost) Wordless Wednesday


Over the weekend, I finished a pillow that I made for a flickr swap...


I adore this fabric- by a designer called Kate Spain, and it's called Good Fortune. So glad I have more of it- I want to make another pillow like this for myself! There is also binding on this pillow (the fabric "edge" around the pillow), which I'd never done before, and binding is still a bit of a challenge for me...those pesky corners! I was nervous, as I saw the profile and blog of the person I made this for, and she's really, really good! I hope she likes this.

I should have taken a photo of the back too, as I used some solid fabrics, but didn't.

Oh well! Next time for sure.

Tuesday, March 6, 2012

shake your shamrock!


A few weeks ago, I was on pinterest, and saw a really cute Valentine mini quilt made by Erin. I pinned it and tweeted it, and then Erin replied and we had a conversation about its cuteness. When I saw it, it was just after Valentines Day, but I thought I might think about making one for the next holiday, St. Patricks Day.
So, over the weekend, I did! I made a little four-leaf clover! I had a jelly roll (a roll of 2" strips, often in the same color family, though not always!). I used greens, of course, and sewed the strips together. Then I found a piece of cardboard and made a heart "stencil," to use to trace. I used something called Steam a Seam, to adhere the hearts to the white fabric, and then sewed over the edges too, and of course, made a little stem. As you can see, I didn't center it as well as I meant to, and it is a bit wonky, but that just gives it character, right?


I am pleased with it! I hung it on a short wall in the hallway (this photo was taken with it on the hardwood floor!), and I decided that this is the perfect spot for mini quilts. This one is just 16" x 16," and I think it took me about three hours total, give or take. I'm a slow sewer!

This was such a fun project, I really enjoyed it. Now maybe I will make one for Easter, and then something summery? A flag? We'll see!

Do you use mini quilts to decorate in your house?